
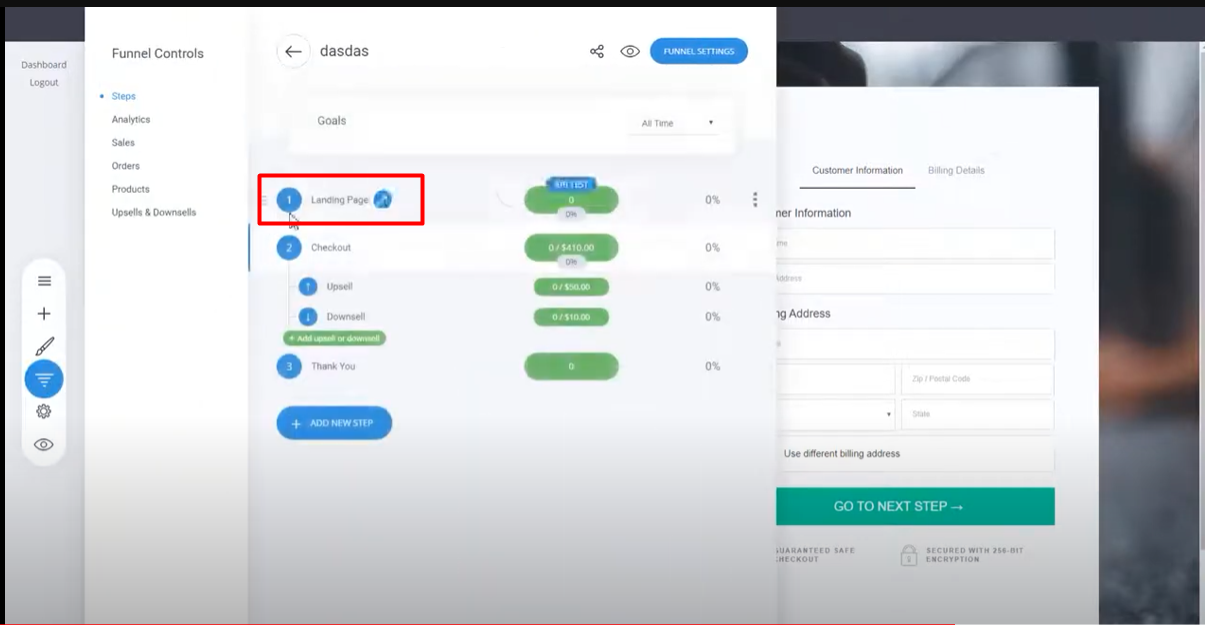
Upsells and Downsells
Access your checkout page: Start by navigating to the checkout page where you want to implement the one-click upsells and downsells.
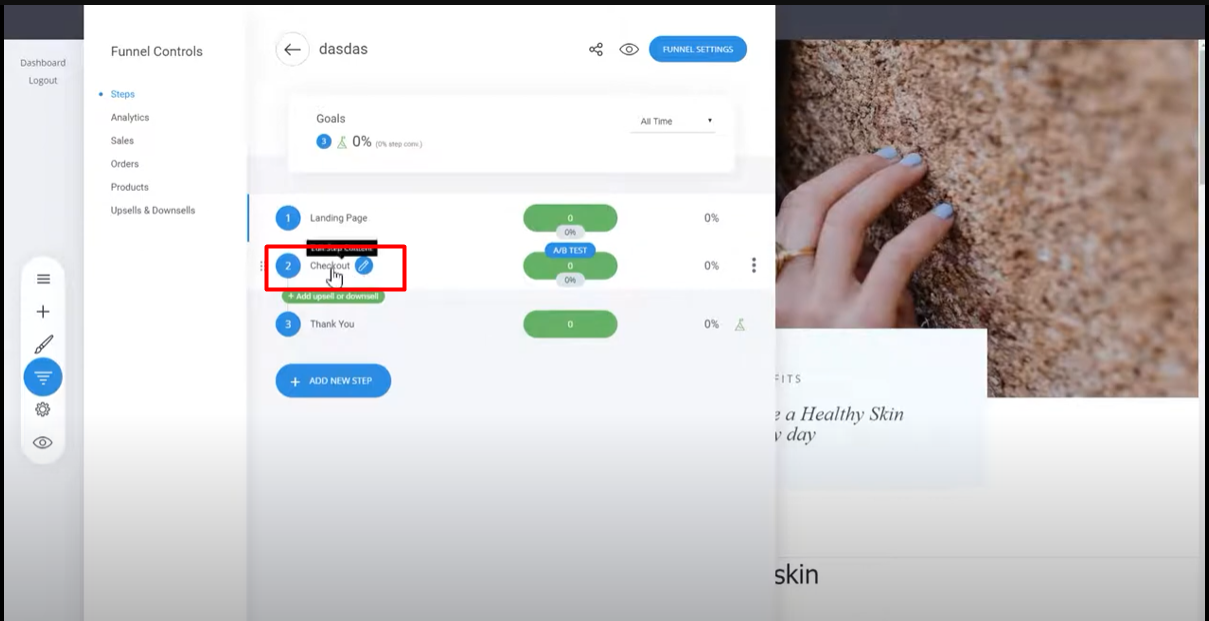
2. Enable the upsell feature: Once on the checkout page, look for the checkout widget and find the button at the bottom indicating it as the checkout button. Click on this button to enable the upsell feature.
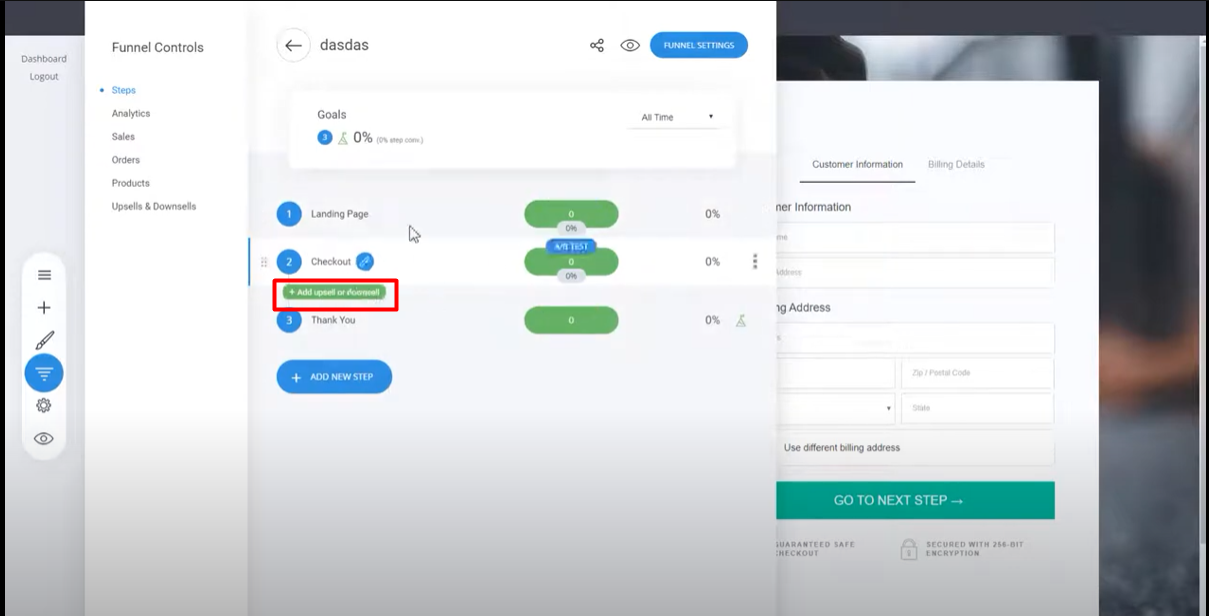
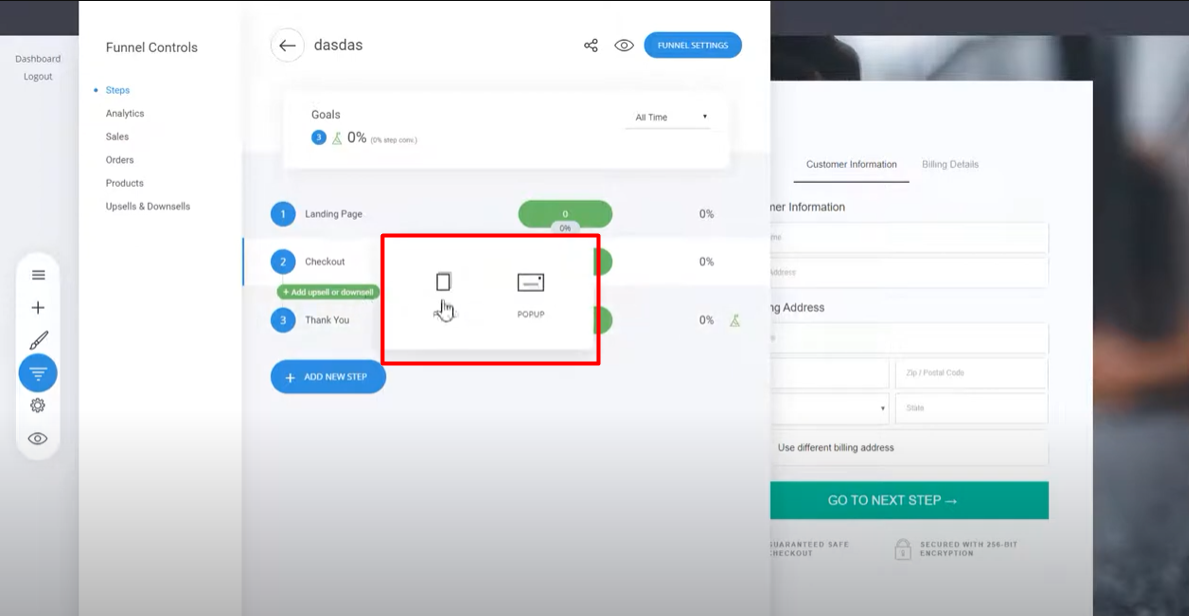
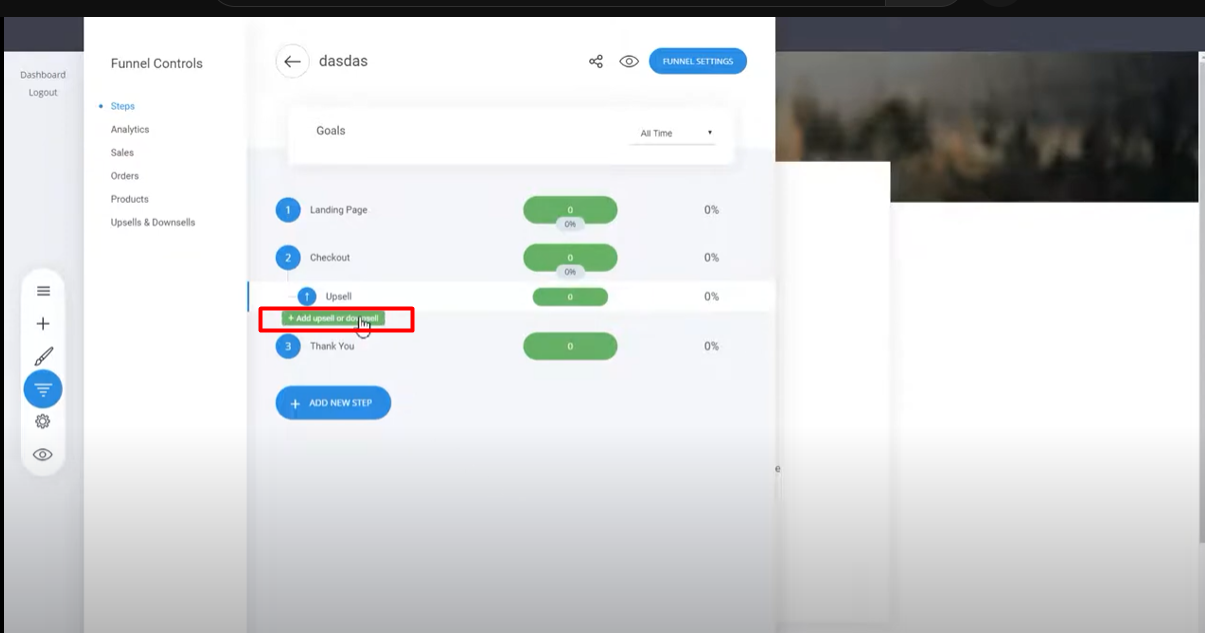
3. Add an upsell page: After clicking on the checkout button, you will be prompted to add a pop-up or a page where you can create the upsell. Choose a page option and proceed.
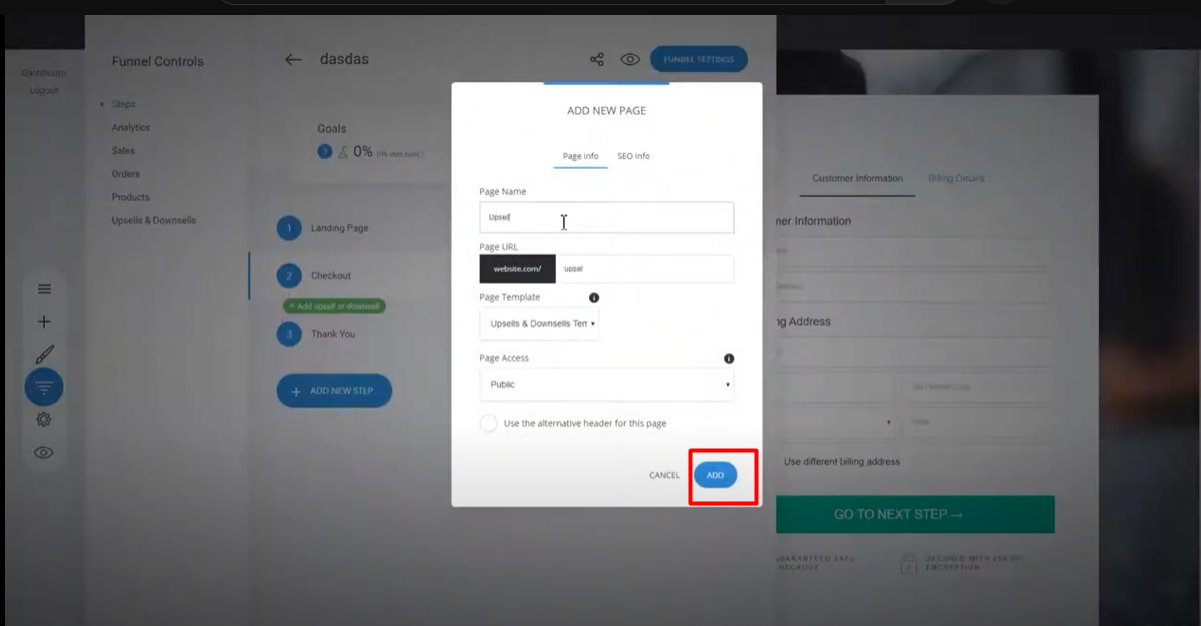
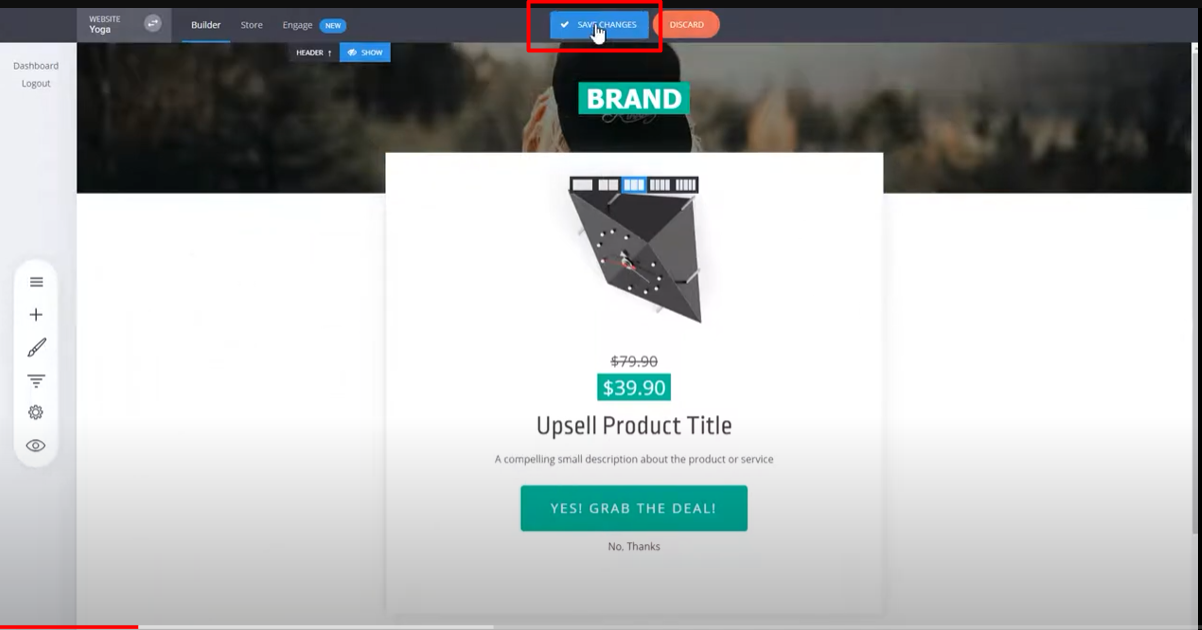
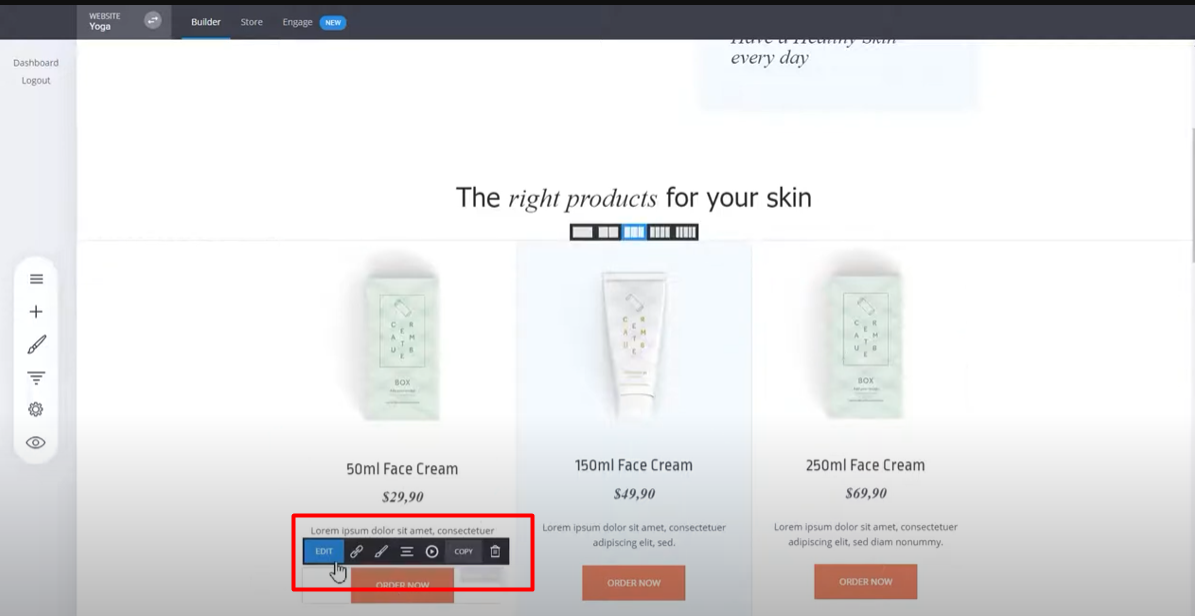
4. Customize the upsell page: On the upsell page, you will find various design options specifically created for upsells. Select a design that suits your needs. You can choose from different layouts, such as one product, multiple products, with ratings, etc. Once you have chosen a design, click on "Add" to create the upsell page.
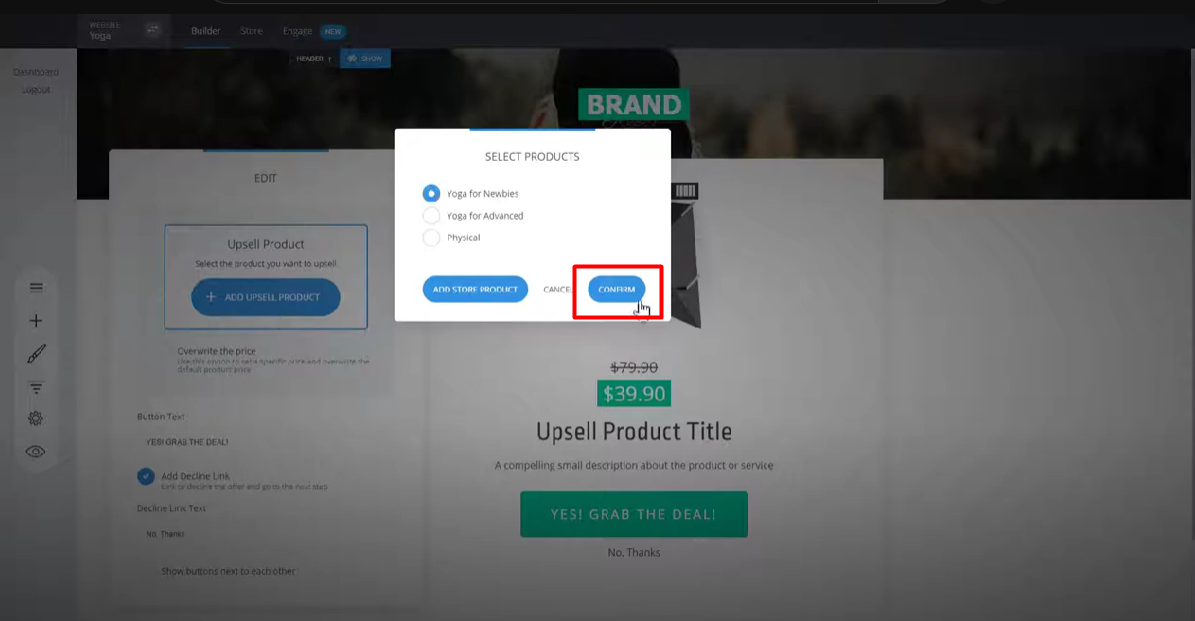
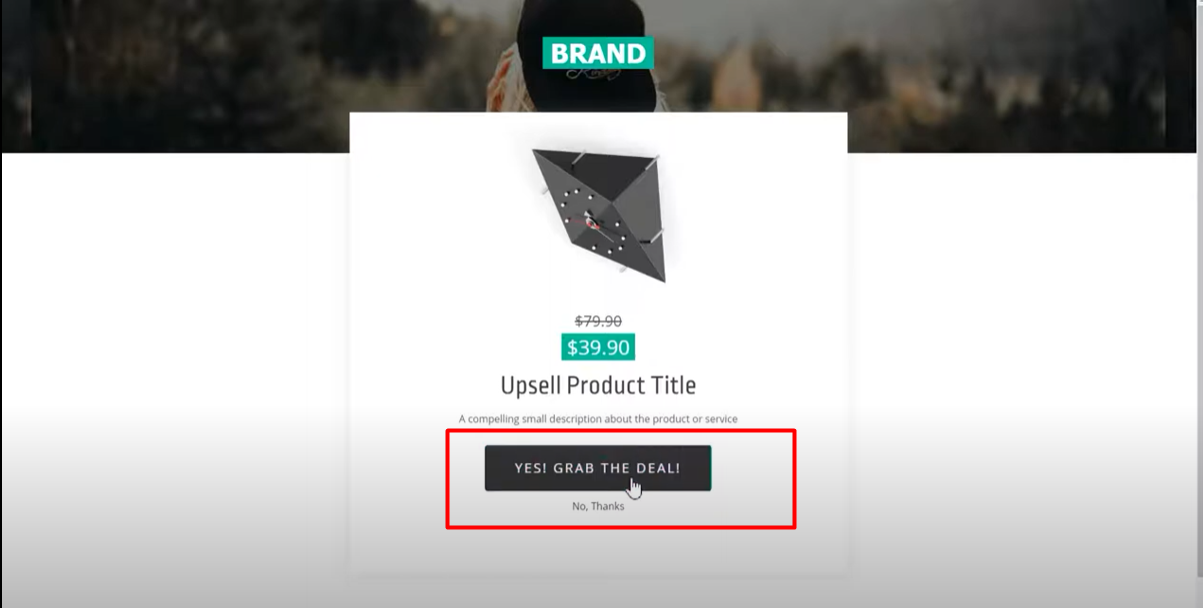
5. Select the product to upsell: By default, when adding an upsell, you will be asked to select the product you want to offer as an upsell. This will open the upsell widget, which consists of two buttons: one to buy the upsell product and the other to decline the offer. Choose the product you want to upsell, and click "Confirm".
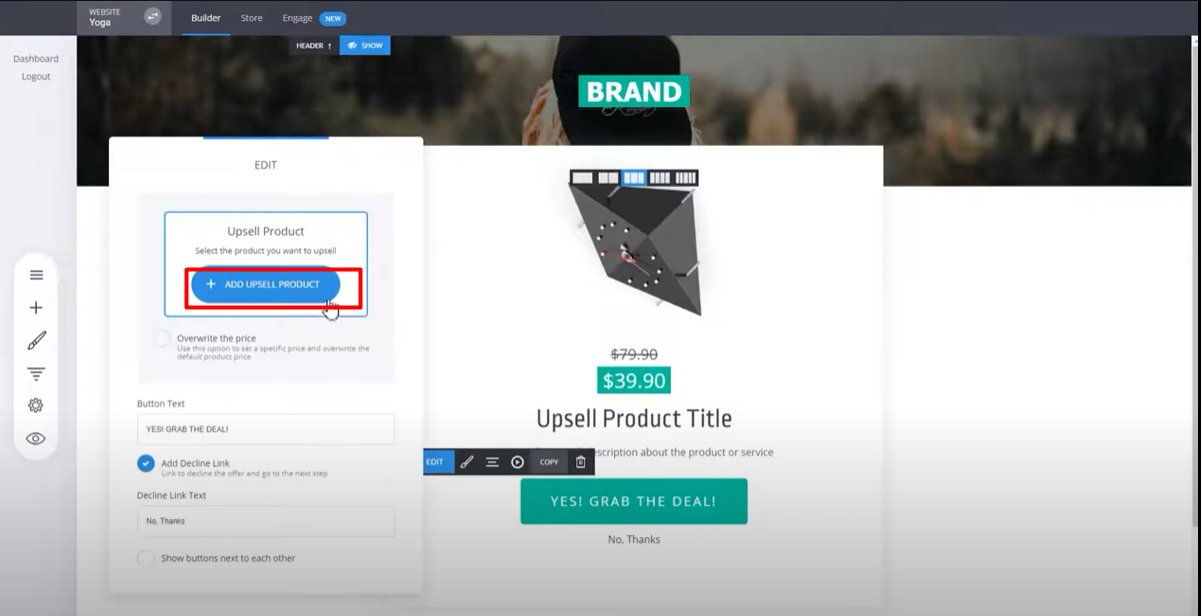
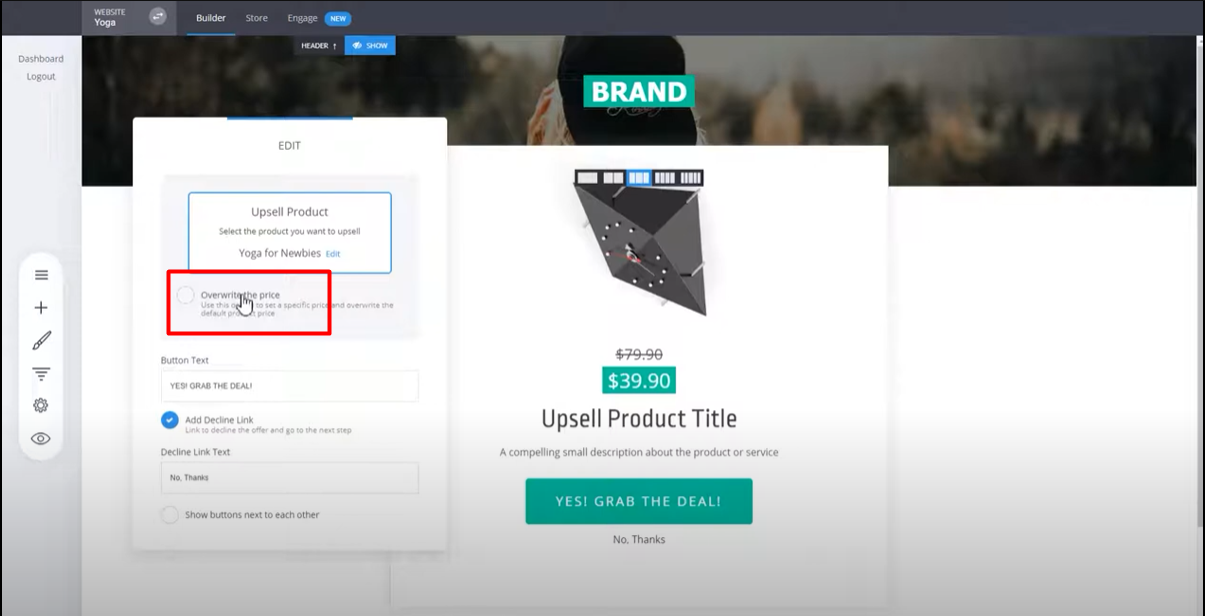
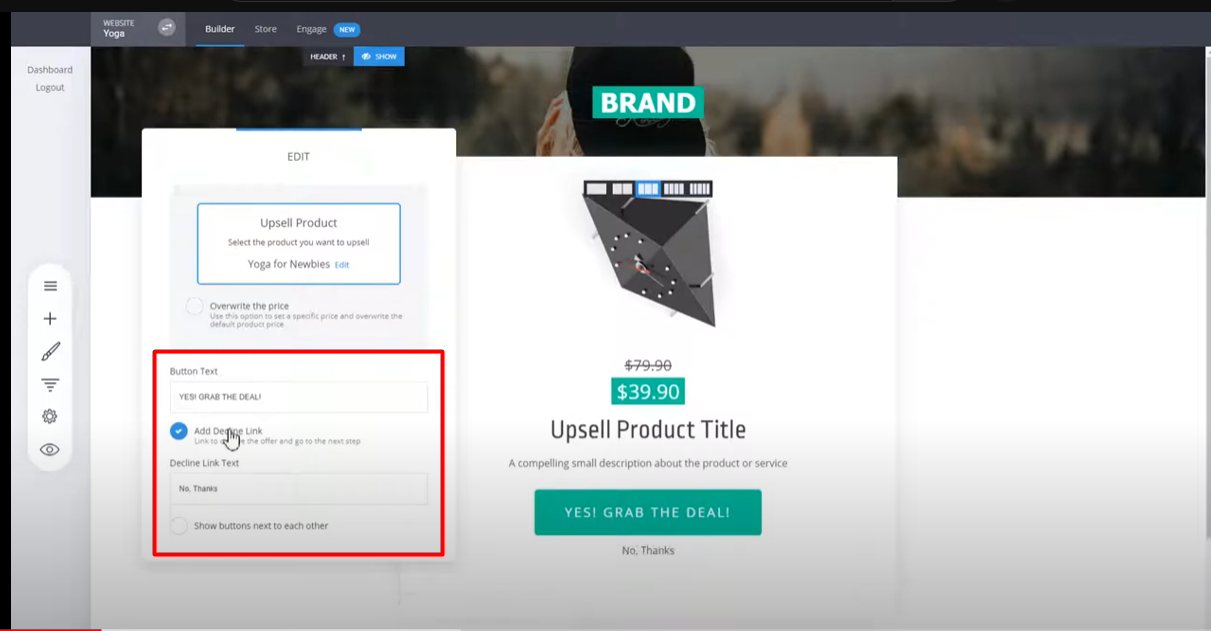
6. Customize upsell options: You have the option to override the pricing of the upsell product. By default, it uses the pricing of the product in your store, but you can set a different price if desired. Additionally, you can customize the messaging for the upsell button, choose to add or remove the decline button, and modify the styling and alignment of the buttons.
7. Save the upsell settings: Once you have made the necessary customizations, click on "Save" to save the upsell settings.
8. Add downsells (optional): If you want to include downsells as well, follow a similar process as above. You can add a downsell page and select the product(s) you want to offer as downsells. Customize the downsell options and save the settings.
9. Test the upsell and downsell flow: Now that you have set up the upsells and downsells, go to the checkout page to test the flow. Complete the order process until you reach the upsell or downsell step. Observe how the upsell or downsell page is displayed, and test the functionality by purchasing or declining the offer.
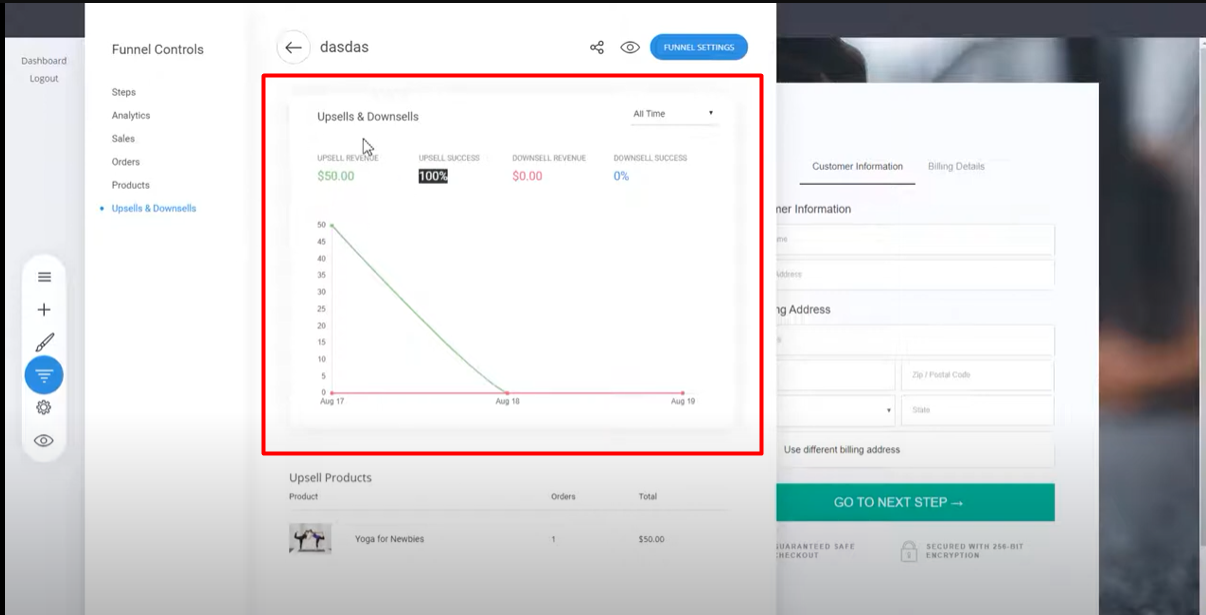
10. Review analytics: After testing, you can review the sales analytics to see the impact of the upsells and downsells. You will be able to track the number of upsells and downsells made, the order values, and the success rate of the upsells and downsells.
11. Additional option: If you want to implement an upsell upon adding a product to the cart, go to the settings and select the option for a popup to show when someone adds a product to the cart. Customize the popup to include the upsell product and provide options for adding to the order or canceling.
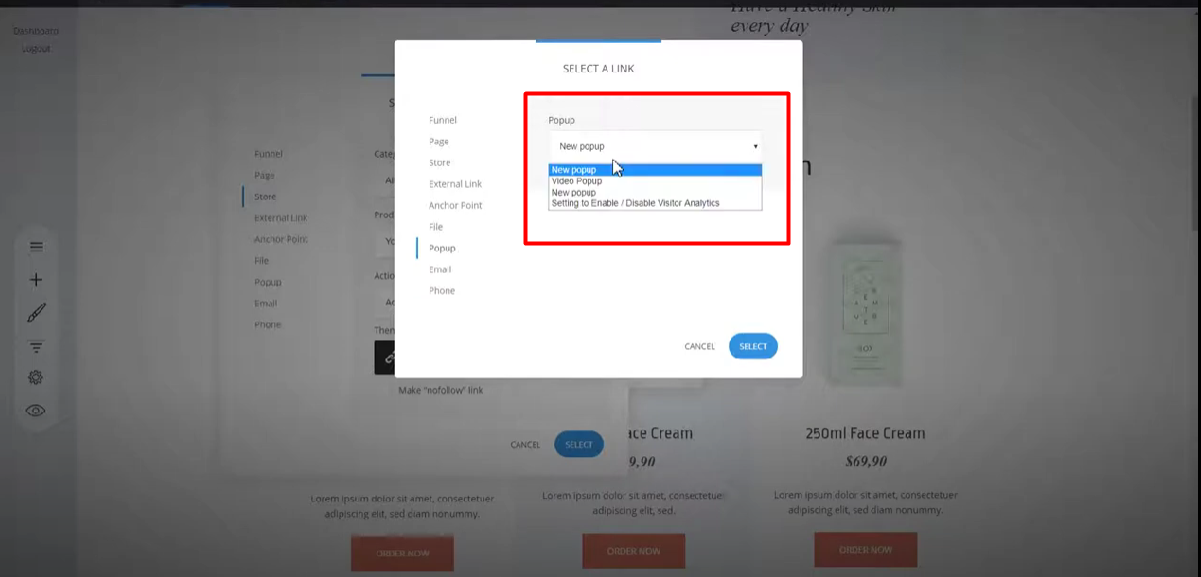
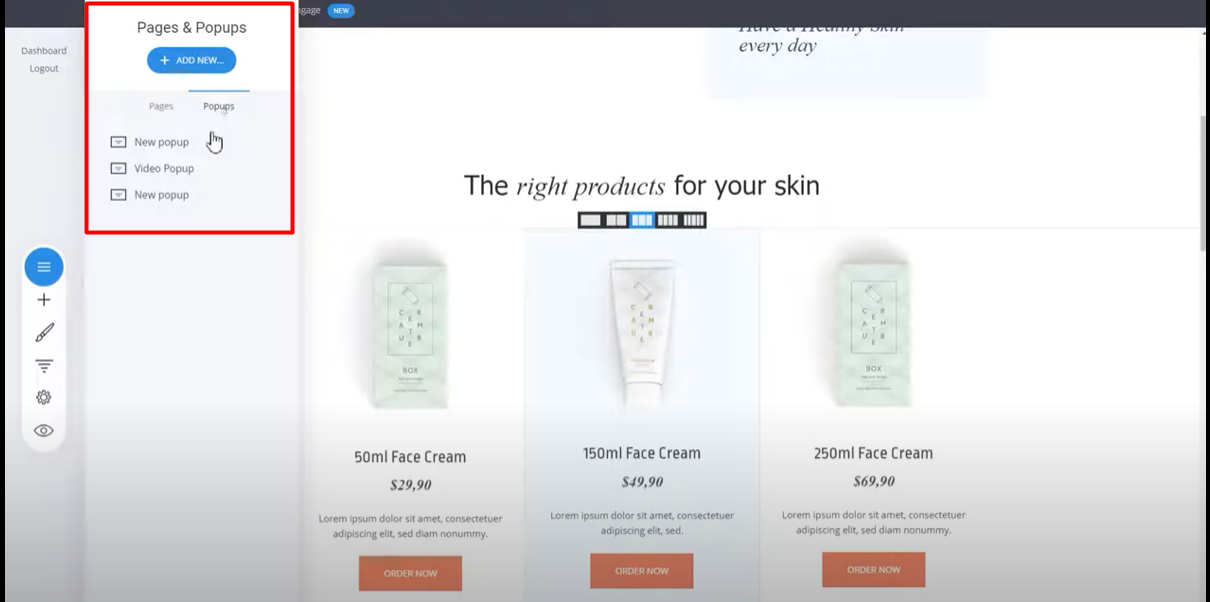
12. Customize popups (optional): To customize or edit popups, go to the Pages section and locate the popups section. From there, you can fully customize the popups by adding products, buttons, and configuring the layout.
Remember, the process may vary depending on the specific software or platform you are using for your checkout page and funnel creation.